If you’re like most people, you probably think of plumbing as something that only plumbers know how to do. But the truth is, plumbing is not all that complicated – anyone can learn how to set it up in their home with a little bit of instruction. In this blog post, we will walk you through the steps of setting up your own plumbing in a house. We’ll cover everything from installing the pipes to hooking up the faucets and drains. So whether you’re a first-time homeowner or just looking to update your existing plumbing system, read on for tips and advice!
What Is Plumbing, and Why Do We Need It in Our House?
The main purpose of plumbing is to provide water for drinking, cleaning, cooking, and other uses. It also carries wastewater away from our homes so that it doesn’t get into the ground or pollute nearby rivers and lakes.
The first step in setting up a plumbing system is determining how much space you have available for pipes, fittings, and other components. You’ll also need to know the type of soil you have and what kind of climate you live in since these factors will affect the types of materials you can use for your plumbing system.
Once you’ve gathered this information, it’s time to start installing the pipes! In most cases, it’s best to start with the main water supply line from your local utility company’s meter box outside of your house. You’ll need a shut-off valve next to the meter so that you can turn off the water if there’s an emergency or repairs are needed elsewhere in the home.
Next, lay down some plastic sheeting on top of where you want to dig trenches for your pipes. This will help protect the pipes from being damaged when they’re buried underground, which can prevent leaks and other problems down the road.
The Materials You Will Need to Install Your Own Plumbing
First, we’ll go over some basic tools and supplies that are essential for any plumbing project:
- A level (a long piece of wood or metal with a bubble inside that tells you when something is correctly aligned)
- A hacksaw or pipe cutter is used to cut through pipes if necessary. These come in different sizes, so make sure you have one that can cut through whatever material your pipes are made out of!
- Plumber’s tape (also known as Teflon or PTFE) is used to seal connections between pipes and fittings in order to prevent leaks from occurring.
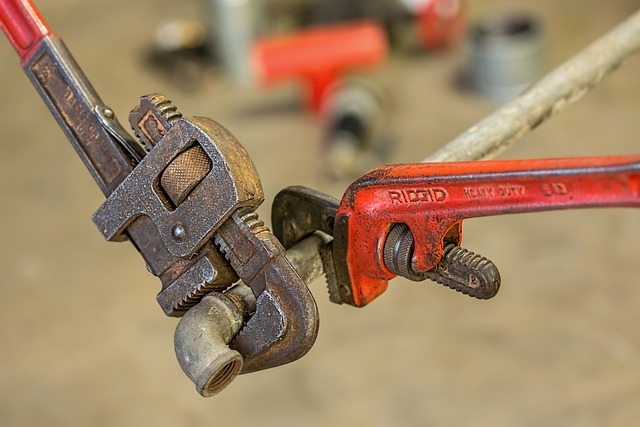
- Pipe wrenches come in handy when working with larger diameter PVC pipes because they provide a lot of torque to get a good grip.
- A plunger is essential for clearing clogged drains – more on that later!
Now let’s take a look at the different types of pipe materials you may encounter during your plumbing project:
- PVC (polyvinyl chloride) is among the most common types of piping used today due to its low cost and durability. It’s easy to work with but requires special glues or cementing techniques when connecting joints together.
- ABS (acrylonitrile-butadiene-styrene) has similar properties as PVC, but it can be welded using heat instead of glue or cementing methods which make for a stronger connection.
- Copper is a popular choice for water supply lines due to its corrosion-resistant properties, but it can be more expensive than other materials.
- Galvanized steel is often used in drain and waste systems because it’s inexpensive and durable. However, it can rust over time if not properly maintained.
Plumbing Fixtures
There are a few things you’ll need to know about installing fixtures like sinks and toilets in your home:
- Sinks can be mounted on the wall or placed on top of a counter. When mounting them on the wall, make sure that the weight of the sink is supported by properly installed brackets or studs.
- Toilets need to be anchored down, so they don’t move while being used or cleaned. You can use either concrete screws with washers or bolts that go through both sides of the toilet flange into an existing stud behind it (if available).
- Shower valves and heads can be mounted on the wall or ceiling, depending on your preference. Make sure to use a waterproof sealant around the edges of the showerhead to prevent water from seeping behind the tile or grout.
When installing a new plumbing system in your home, it’s important to carefully read the instructions that come with your products. There are plenty of online resources available as well, so don’t be afraid to ask for help if you’re not sure how to proceed. With a little bit of planning and elbow grease, you can save yourself a lot of money by doing the work yourself!
How to Measure for Pipes in a Plumbing System
The first thing you’ll need to do is determine what type of pipe material will be used in your system (PVC, ABS, copper, and many more). If it’s going through concrete floors or walls, then make sure they’re rated for this application. Next, measure the length and diameter measurements for each piece, as well as any special fittings that will be needed. This can usually be done with a simple sketch on paper.
Now that you have all the materials and measurements, it’s time to start digging! Make sure to follow any local codes or regulations when doing this, and always use gloves, goggles, and other safety gear when necessary.
Final Thoughts
Installing a plumbing system in your home can seem daunting, but with a little planning and preparation, it’s definitely something you can do yourself. We’ve provided some basic tips and instructions to get you started, but be sure to consult with a professional if you have any questions or concerns. With the right tools and knowledge, you can save yourself time and money by doing the work yourself!

