You cannot repair your desktop computer’s power supply, you can only replace it. Unless you are a qualified technician, don’t ever attempt to open your PC’s power supply to fix it yourself. Always remember – don’t ever try to repair, just replace.
Even when the computer is turned off and unplugged, its power supply still stores powerful jolts of electricity. Power supplies are safe until you begin opening and poking around inside them. So, don’t underestimate the power of your desktop computer’s power source!
A good power supply serves as a foundation for a low-maintenance and highly stable and reliable computer. But more often than not, pre-built and boxed desktops are equipped with the cheapest power supplies that meet the criteria of their product warranties.
So this means that after two or three years after purchasing your desktop computer, it is likely to stop working – or worse, start to emit a puff of black smoke. Upgrading your graphics card can also push your desktop computer’s power supply to its limits, depending on the model.
But, don’t fret – replacing your PC’s power supply is not at all that difficult.
Make sure to gather appropriate tools, such as a pair of gloves and a good set of screwdrivers.
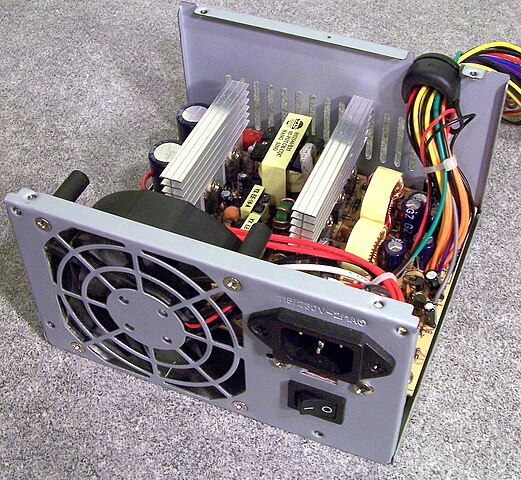
Start by turning off your desktop PC and unplugging all of the cables connected to your computer. If your power supply unit (PSU) includes a power switch that can be accessed on the back of your computer, switch it to the “off” position. Next, remove the side panel of your computer’s case so you can access the PSU.
You will encounter a number of various power connectors that lead from the power supply and power the different components in your PC. Make sure to unplug all the cables before proceeding to remove the power supply, or else they will snag and keep the PSU in place.
It’s helpful to take pictures of the cables that were plugged into their appropriate components so that you can have a clear reference for plugging them in on your new power supply. Also, make sure to remove the four- or eight-pin CPU power connector located near the CPU socket on the motherboard, as well as the 24-pin power cable linked to the motherboard along its mid-line on the left side.
While removing the cables, pull each of them out of the case to prevent tangling with the other cables. Doing so also makes sure that all the cables are disconnected, making it easier to remove the PSU from the case once you’re done.
Next, you’ll have to unscrew your PC’s power supply from its position. Usually, there are only four screws, but it still depends on the model. Set these screws safely to the side as you remove them. After that, you can now finally remove the power supply from its case.
Replacing your desktop computer’s power supply
If you assume that choosing a new power supply to replace your current one is the easier part of the process, think again. It can be a difficult, and even daunting, task. Fortunately, many online guides will help you to choose the best power supply for your desktop PC. You can also look up at the power supply’s wattage rating, which is usually listed on its side.
These methods will help you understand how much wattage your new power supply will require to deliver and which features you will want. That is unless you will want a newer and more powerful graphics card that requires a newer, more powerful PSU.
There’s nothing wrong with purchasing a new power supply that offers more power than you actually need, particularly if there’s the likelihood of further component upgrades for your desktop computer in the future.
Once you have chosen and purchased the new power supply, insert it into the same position that was once occupied by your old power supply. Use the screws (that once held the old power supply) in position on the back panel of the case to do the similar thing for your brand-new power supply.